- UAlberta Home |
- Find a Person |
- ONEcard |
- Bear Tracks |
- Maps |
- Email & Apps |
- eClass
This FAQ guide is intended for current editors, who already have experience with OJS software. If you're new to journal publishing, visit our Starting a new journal page.
Each piece of information is called a Block. We use a plugin for this, called Custom Blocks Manager. To update the text go to Website → Plugins tab.
Find Custom Block Manager about halfway down the page, and click on the left-hand triangle to show you the option Manage Custom Blocks. If you select the block you want to edit, click Edit, you will get a pop-up box with the text in question.
There are 2 main ways to contact all users registered for your journal: make an Announcement or send a Bulk Email (new feature).
Announcements may be turned on or off under Website → Setup → Announcements → Checkbox toggle: Enable announcements. Once turned on, an Announcements button will appear on your Dashboard.
Depending on your journal settings, announcements may also appear on your journal homepage or dedicated Announcements page.
You have the option to send announcements to every registered user (unless they've opted out) by going to Announcements → Add Announcement → fill in details → Checkbox Send an email about this to all registered users.
Announcements are appropriate for content such as Call for Papers, recruitment for Reviewers, and other informational content.
This is a new optional feature. When this feature is enabled, a journal manager will be able to send an email to all users registered with their journal (and bypass anyone who has opted out of notifications). Misuse of this feature to send unsolicited email may violate anti-spam laws in some jurisdictions and may result in your server's emails being blocked as spam.
Before requesting this feature, we encourage you to familiarize yourself with Canada's Anti-Spam Legislation.
Please consult with us if you want to add this feature, by contacting library.publishing@ualberta.ca.
A few things may be causing this issue:
Make sure that the user's email address (the one attached to their current account) is the correct one, and correctly spelled. OJS does not verify email addresses, and typos happen! Users also often inadvertently create multiple accounts under different usernames.
Secondly, if the email is a notification, make sure that the user's notifications are set correctly. Users can opted out of receiving OJS notifications (including email notifications) for Discussion-related activities. The user may have done this a while ago, and forgotten. Since this setting is controlled at the individual user-level, we recommend asking the user to make these changes. While editors can technically "log in as" users to make changes, we recommend against this, as most users are unaware of this and some may be alarmed when actions are taken without their knowledge/permission.
That said, you can log in as the user to check their Notification Settings: Users & Roles → Users → Search → Log in As → Hover over username (top right corner) → View Profile → Notifications → Checkbox for each notification.
Check the spam filter: OJS emails are packaged in a way that even though emails are sent out by University of Alberta servers, the Sender is listed as your own email address (or the journal's main contact). A small number of institutional email servers may flag this as suspicious.
That said, every institutional email server is configured differently, so ask the user to check their Spam folder. Ask the user to mark the legitimate email as "not Spam" or adding your journal's email addresses as "Safe" can help future cases.
DOIs are intended to be permanent, unique identifiers that stay with a piece of content (such as an article) for its entire history. DOIs are designed to be machine-readable, and do not need to be human-readable.
DOI creation involves two steps:
It's highly recommended that you add DOIs to your article files, in full-text galleys. However, it's critical that you avoid typos. Here are some best practices:
Firstly, make sure that there is a DOI in the Publication > Identifier field.
Please email us at library.publishing@ualberta.ca, with the article's URL.
The newest version of the ORCID plugin allows for the configuration of 2-way communication between OJS and ORCID. Not only will an author’s ORCID appear in their article’s information, but upon publication, the article citation data will also automatically appear in the author’s ORCID profile (if they give permission). In order to prevent fraudulent use of a researcher’s identity, OJS’s ORCID plugin requires “authorization” from the researcher for every Submission, even if they’ve already linked their ORCID to their OJS user profile.
Please contact library.publishing@ualberta.ca, so we can enter and verify the configurations. We use our University of Alberta Library credentials to send information securely to ORCID.
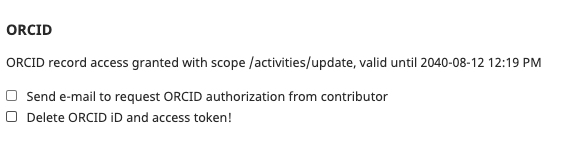
Editors can verify whether an ORCID is authorized by the iD-holder, by going into each submission’s contributor metadata, to check: Submission → Publication → Contributors → Edit.
If the ORCID is authorized, it will have an expiry date.
If the ORCID is not entered (or authorized), the message will say "ORCID not authenticated! Please request authentication from the contributor."
There are a few ways in which an author might receive an invitation to authorize their ORCID:
1. At the time of Submission, a Submitter can choose to send an invitation to their co-authors or themselves, while they input contributor information.
2. An editor can send the invitation any time pre-publication. They can do so by editing the Contributor metadata on the Submission (as described above)
3. For all authors who have not yet authorized their ORCID, they may get an automatic email invitation upon the publication of their article. (This auto-invitation is optional; you can turn off the automated option and do it manually instead).
Because of these multiple ways, it is possible to generate multiple competing links. The latest link usually overwrites the older ones, so authors should avoid using any outdated email links!
If there is an error, the editor can remove the token and try again using the checkbox "Delete ORCID iD and access token!" and Save. The ORCID will disappear from the submission metadata.
For more detailed instructions go to: https://docs.pkp.sfu.ca/learning-ojs/
For help, contact library.publishing@ualberta.ca.